• Slider Image
About me...

About me...

A teacher at heart, I have nearly 30 years experience in education both teaching students and providing faculty development.

Read More

My work...

My work...

Here are several examples of my work from the last few years, including design documents, videos, and other multimedia.

Read More

My writing...

My writing...

Here are some of my most recent book chapters, journal articles, conference proceedings, presentations, etc.

Read More

Dealing with the “disruptive technology” – AI

It’s been over a year and a half since ChatGPT launched and literally disrupted our teaching and learning lives. “Disruptive Technology” is a phrase coined by Clayton M. Christensen in 1995 and often used throughout the decades to describe new, innovative technologies that change how things are done in life either socially or by businesses, industry, etc. thus challenging traditional education and necessitating a change in educational practices. Most of us know or can imagine the upset caused by the intervention of the calculator, for example.

Most will agree that generative artificial Intelligence, specifically through applications such as ChatGPT, Claude, Monica, Microsoft CoPilot, etc. has disrupted teaching and learning at all levels of education. Debates about various ways AI has been used are ongoing and sometimes a bit contentious. Some teachers and other stakeholders are concerned that AI is leading to limited learning, cheating and plagiarism, and an overall decline in quality education. While students have expressed concerns with their teachers’ use from limited and vague feedback to lack of creativity in lesson activity development.

Voices of wisdom tell us to use AI judiciously and purposefully. Use it because, like calculators and the Internet, it isn’t going anywhere. Plan for AI use, make clear decisions about why you will or will not allow AI use in a particular class assignment. There are so many things an instructor or instructional designer should consider when planning courses: aligning resources and activities to lesson objectives, which in turn, align to course goals, content and resource copyright issues, time taken to complete tasks, and issues related to diversity, equity, inclusion, and accessibility (DEIA).

When I took my first job as an instructional designer at Texas State University, the very wise leaders of our ID group had already created a lesson plan template of sorts to use with faculty when designing courses. This was used before development ever took place.

The original template had 5 columns: Lesson or Module # and title, Lesson objectives, Read and View, Ungraded Assignments (including discussions or practice tests, or other activities not graded or minimally weighted) and Graded Assignments. Alignment was specifically captured by adding parenthetical notes behind each objective with the title of assessments in the last columns. While not visible, alignment was also discussed between lesson or module objectives, Read and View resources, and Ungraded Assignments.

Eventually, the planning matrix (as our lesson plan was called) further revised to give guidelines to faculty when adding actionable, measurable objectives (think Bloom’s), resources, and activities. It eventually added another column for “Feedback Plan” so instructors had to consider when students needed feedback and how much work they were putting on themselves with their plans in terms of grading.

Recently, I’ve wanted to further revise the PM to force the above-mentioned considerations: Namely, purposeful DEIA and AI considerations. Attached you will find that document template. Note that the original PM used by the ID department in Instructional Technology Services and later by the Office of Distance & Extended Learning under Academic Affairs at Texas State University held a Creative License, free-to-use license. This revised version does as well.

Worried about Chat GPT?

Listen to this podcast from Harvard by one of my favorite superstars in instructional technologies, Chris Dede. This really helps to put things into perspective. AI isn’t human. It can generate responses, but it doesn’t understand what it is saying. “Generative AI” can make the difference. According to Dede, we should consider “evidence-based modeling” where the AI can access multiple resources to help generate a forecast based on past behavior.

Is ChatGPT disruptive? Yes, without a doubt. But do we need to try to fight it? What’s the point in that? Embrace it. Adapt to it. Design with AI in mind.

“Raises the bar for human performance…”
“AI…helps us understand the kind of writing that we should be teaching versus the kind of writing that we are teaching.” 

 “Yeah, don’t be scared. AI is not smart. It really isn’t. People would be appalled if they knew how little AI understands what it’s telling you, especially given how much people seem to be relying on it. But it is capable of taking over parts of what you do that are routine and predictable and, in turn, freeing up the creative and innovative and the human parts that are really rewarding part of bork and life.”

ODEL Summer Institute 2021

This summer, we had the opportunity to deliver an outstanding multi-week summer institute to a select group of faculty members at Texas State University. The first week kicked-off with a variety of speakers with daily themes, including Diversity, Equity, Inclusion & Cultural Competence, Instructor and Student Voices, Active Learning and Interaction, Zooming for Inclusivity and Copyright/Fair Use, and Multimedia in a Multi-modal World. Keynote speakers included Dr. Patricia Young from the University of Maryland Baltimore County, Dr. George Veletsianos, Canada Research Chair, from Royal Roads University in  Victoria, BC, Canada, and Dr. Richard Mayer, Distinguished Professor, from the University of California, Santa Barbara. I had the pleasure of working with each of these presenters in preparation for the institute, and each are outstanding professionally and personally.


In addition to the Keynote speakers, which was open for the entire university to attend, faculty and staff from various departments in the university also presented to the participants on related topics.  During the presentation week, participants met with their instructional designers to reflect on what had been discussed and presented and engaged in goal-setting activities, including identifying what was doable and what their next steps should be. They presented these on Friday afternoon to the whole group.

The remainder of the 9 weeks was spent meeting individually and in small groups with assigned instructional designers to enhance previously created courses or create new courses based on their goals. These courses had to be 100% ready-to-teach by August 6. A virtual Oscars-style showcase on August 6 was conducted and mc’d by ODEL’s Mary Anderson. Each participant had created a video showcasing their course sites or participated in an ID led interview. Each received an award in a category befitting their work.

Participants were asked to complete two surveys during the institute. The first survey was to get feedback on the institute’s keynote speakers, faculty and staff speakers, the goal setting worksheet and discussion, the additional webinars, and their understanding and attitude moving forward. Ten out of the 11 participants completed the survey. All marked agreed or tended to agree with the statements for each day:

  • The keynote speaker contributed to my understanding of student and course resiliency.
  • The Q & A with the keynote speaker contributed to my understanding of student and course resiliency.
  • The faculty presentation contributed to my understanding of course and student resiliency.
  • The staff presentation(s) contributed to my understanding of student and course resiliency.
  • The goal setting worksheet and discussion with my ID contributed to my understanding of student and course resiliency.

Additionally, all agreed or tended to agree with the statement, “The separate webinars on Tuesday and Thursday contributed to my understanding of student and course resiliency” and all but one either agreed or tended to agree with the statement, “I have a clear understanding on how to proceed to reach my goal.” Finally, all ten agreed with the statement, “I’m looking forward to working on my course with my instructional designer over the next 8 weeks”.

Participants lauded the event and the activities within the event when asked what they liked best. One participant wrote, “It’s difficult to pick 1 thing. The selection of other attendees with the programming made for a special week. I was able to connect w/the attendees even through Zoom and I didn’t expect to find other like-minded faculty as part of the institute. The programming was just excellent. Varying the heavy “intensive” days with the T/R lighter days with 2 webinars helped so much. It’s hard to do a typical intensive because there’s no time to rest or process. Even though I had a lot of demands during the week, I appreciated the lighter days T/R and a chance to catch my breath. The keynotes were really terrific and the panel discussions were great, too. THANK YOU SO MUCH for creating this event, planning it, conducting it virtually and after an exhausting and traumatizing year. There was an abundance of care from start to finish. I’m very appreciative to be a part of this. Thank you all!”


Suggestions included more breaks, more time with instructional designers, and more hands-on activities.

The second survey was administered at the end of the institute following presentations. Only 7 of the 11 participants responded. All 7 chose “Agree” with the following eight statements:

  • Overall, I am satisfied with the Summer Institute.
  • I would recommend future ODEL Summer Institutes to others.
  • I am proud of the work I have done during this Summer Institute.
  • I plan to apply what I’ve learned during this year’s Summer Institute to future course design.
  • I feel confident that I have the knowledge and skills to develop quality online course materials.
  • Overall, the depth of information in this Summer Institute was about right.
  • The work with my instructional designer/course developer was invaluable.
  • I found the group meetings with my instructional design consultant


All chose “Agree” (6) or “Tend to agree” (1) with the following statements:

  • I was able to make progress toward’s my goals set during the first week of the Summer Institute.
  • I liked the format of the final showcase.

All chose “Agree” (5) or “Tend to agree” (2) with the following statement:

  • I feel ready to teach the course I have developed during the Summer Institute.

Finally, 4 people “Agreed” and 1 person “Tended to Agree” with the statement, “I found the use of MS Teams for collaborating with my instructional designer to be helpful”, while 2 chose “Tend to Disagree”.


One participant commented, “I don’t feel completely ready but this summer was very demanding, professionally and personally, for me. What’s important is that I feel much more at ease about teaching my class and more confident about what I’ve done than I would have without the SI. Also, for MS Teams, I don’t like this tool for collaboration. I appreciated how my ID was willing to use Zoom and other tools to work together.”

Participants commented they enjoyed the kick off week and meetings with IDs for collaboration and feedback the most. When asked what they disliked, only 2 comments were made and included not being able to meet in person and concern about the amount of work that needed to be done in such a short period of time.

It’s important to note that participants did also receive stipends for their work in the institute. Surveys were completely anonymous.

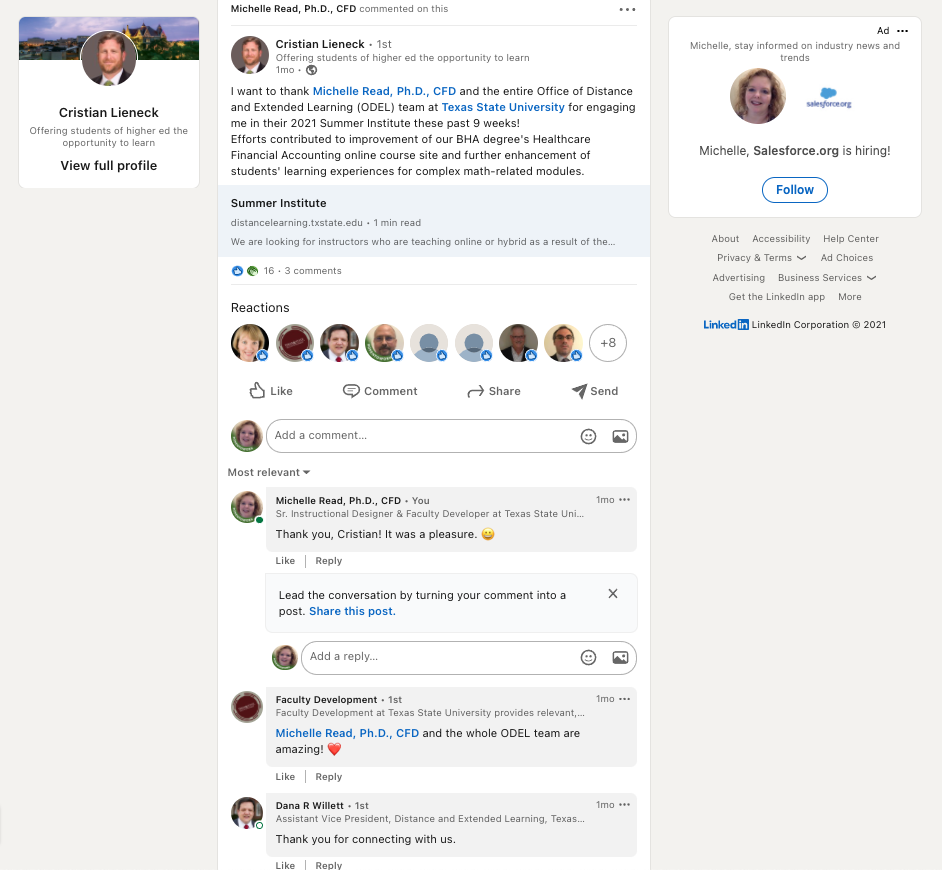
It was really such a pleasure to be a part of the planning for such an amazing event. It all came together very nicely. A couple of days after the conclusion of the institute, one participant, Dr. Cristian Lieneck gave our team a shout out on LinkedIn:

I want to thank Michelle Read, Ph.D., CFD and the entire Office of Distance and Extended Learning (ODEL) team at Texas State University for engaging me in their 2021 Summer Institute these past 9 weeks! Efforts contributed to improvement of our BHA degree’s Healthcare Financial Accounting online course site and further enhancement of students’ learning experiences for complex math-related modules. 

Screenshot of LinkedIn shoutout


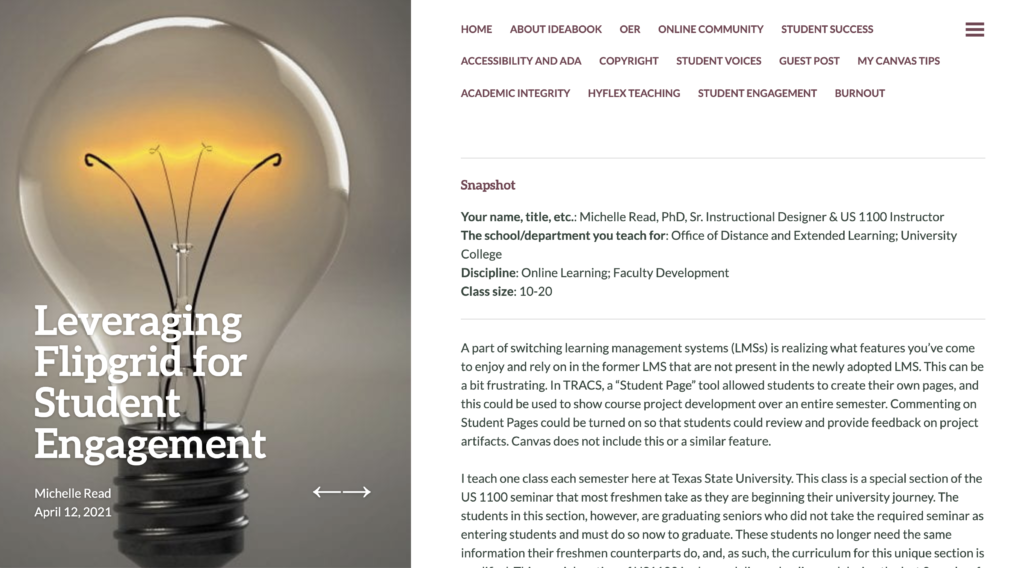
Leveraging Flipgrid for Student Engagement – a New IDeaBook Contribution

I’ve added another piece to ODEL’s IDeaBook. This article is called Leveraging Flipgrid for Student Engagement and is based on my combined use of FlipGrid and Microsoft OneDrive to solve a problem with the university LMS, Canvas. Namely, Canvas, unlike Sakai, our former LMS, does not allow for students to create pages with their own content that is not editable by all. Nor, can anyone leave comments on individual pages. I used to use Sakai’s Student Pages to have students attach their mock interviews, their draft cover letters and resumes, feedback for both documents from Career Services, a job description from a mob they might apply to, and a set of anticipated interview questions. Using FlipGrid and OneDrive, I simply have students add all of their documents to a OneDrive folder that they then share. They copy the link into their 10 minute mock interview snippet posted in FlipGrid.


The following article lays out the process and provides links to annotated screenshot directives for both the instructor and student.


https://ideabook.wp.txstate.edu/2021/04/12/leveraging-flipgrid-for-student-engagement/

Leveraging Flipgrid for Student Engagement post Screenshot


A part of switching learning management systems (LMSs) is realizing what features you’ve come to enjoy and rely on in the former LMS that are not present in the newly adopted LMS. This can be a bit frustrating. In TRACS, a “Student Page” tool allowed students to create their own pages, and this could be used to show course project development over an entire semester. Commenting on Student Pages could be turned on so that students could review and provide feedback on project artifacts. Canvas does not include this or a similar feature.

I teach one class each semester here at Texas State University. This class is a special section of the US 1100 seminar that most freshmen take as they are beginning their university journey. The students in this section, however, are graduating seniors who did not take the required seminar as entering students and must do so now to graduate. These students no longer need the same information their freshmen counterparts do, and, as such, the curriculum for this unique section is modified. This special section of US1100 is always delivered online and during the last 8 weeks of the semester.

­­­­My students are asked to go through the process of applying and interviewing for a job. In that regard, they must submit a resume and cover letter to Career Services and then submit the following in the LMS for peer and instructor review:

  • Job Description
  • Original resume sent to Career Services
  • Original cover letter sent to Career Services
  • Resume feedback from Career Services
  • Cover letter feedback from Career Services
  • Finalized Resume
  • Finalized Cover letter
  • Likely interview questions based on research, including questions they might ask of the interviewer.
  • 8 to 10-minute mock interview video
  • A link to their digital portfolio (optional)

This is a major project and having used Student Pages in TRACS in the past, I needed to find a new way to organize this project in Canvas. The combined use of FlipGrid and Microsoft 365 resolved my issues.

To replicate my course project in Canvas, I needed a new way for students to organize their video presentation (mock interview) and the associated files. By combining the use of FlipGrid and Microsoft 365, the productivity application suite every instructor and student has access to through the University, you can organize project artifacts easily.

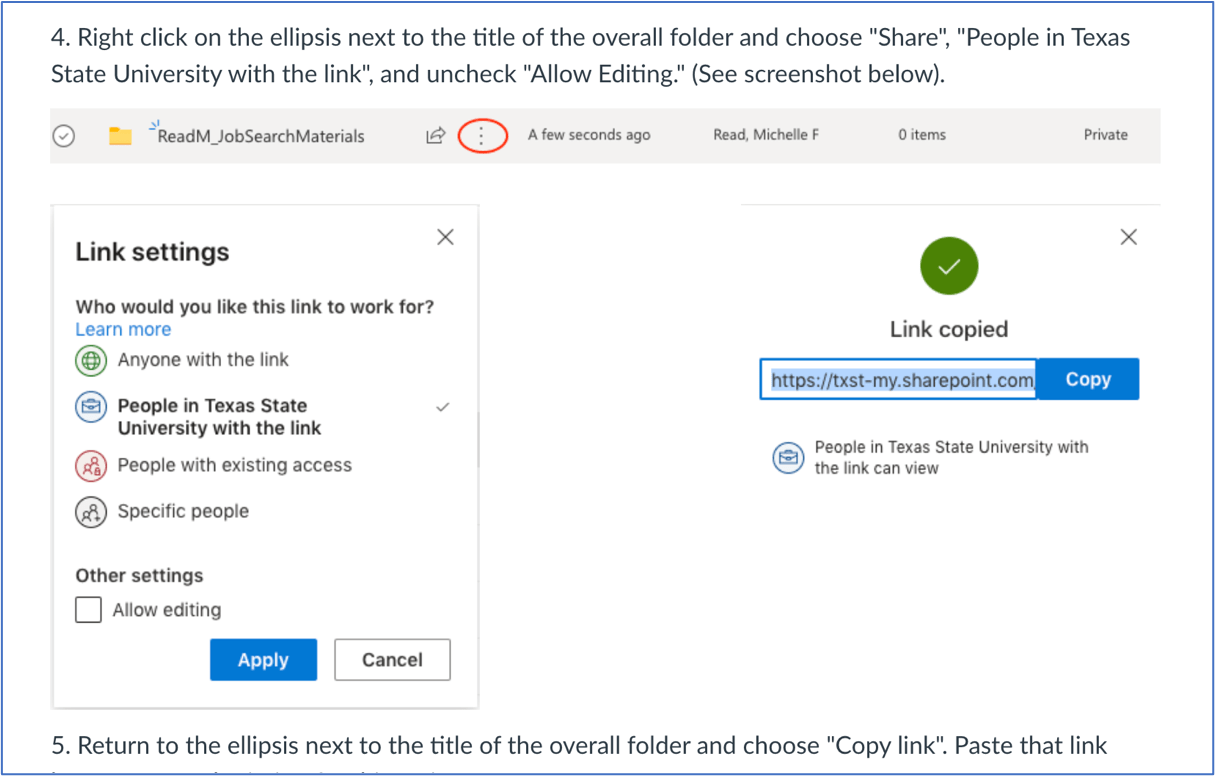
Microsoft 365 OneDrive is an online storage system for documents, images, videos, etc. created by TXST faculty, staff, and students. It is a part of the Microsoft 365 suite. Documents created online through Microsoft 365 applications or offline through other apps can be stored and shared. I ask my students to create a folder, add all of their associated job application and interview files, and share the folder with “People at Texas State University with a link”. Students are also instructed to disallow editing. Finally, they are instructed to copy the link and paste that link into FlipGrid. All of these actions are handled via the ellipsis next to the folder title. See screenshot below.

Screenshot showing how to share a folder, disallow editing, and copy the folder link.

Sharing folders

FlipGrid is similar to a discussion forum, but instead of typing out responses to a given prompt, students record a video response. In turn, their peers can record or type a reply, depending on what settings you establish. You can set up as many groups and discussion topics as you like. Some other advantages of FlipGrid are:

  • It is free to use!
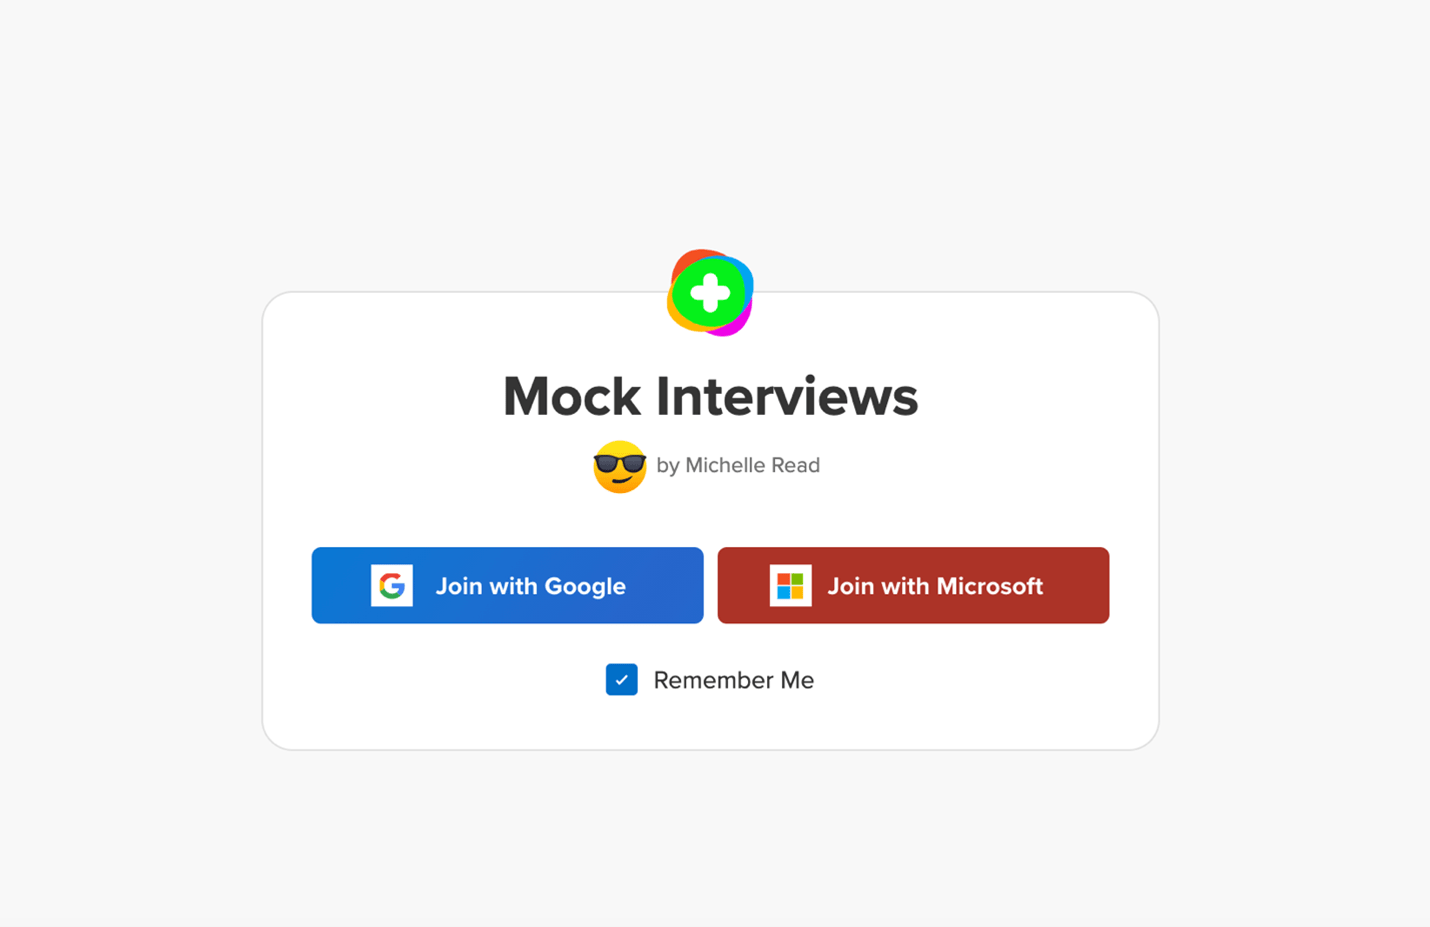
  • Texas State University instructors and students simply login to accounts through their Microsoft 365 login credentials, which, in our case is simply your NetId and password. An embedded FlipGrid activity doesn’t even require students to leave the course site. When students come across a FlipGrid activity, they will see the option to login or “join” the activity via Google or Microsoft. See screenshot below.
Screenshot showing and embedded FlipGrid login, or join options.

Flipgrid Login/Join Options

Additionally,

  • You can integrate FlipGrid into Teams as well.
  • When creating a FlipGrid topic, you can insert other media types (e.g., video prompts, images, documents, Kahoot! Activities, etc.)
  • You can attach documents, such as a rubric or website urls as/if needed to the topic prompt.
  • You can restrict recording times from 15 seconds to 10 minutes.
  • Students can also upload or link to a video rather than record directly into FlipGrid.
  • You can set student commenting on peers’ videos to video only, text commenting only, or a combination.
  • You can set up notifications to be alerted when new videos/comments are added.
  • You can allow/disallow students to attach virtual sticky notes at any point in their videos. “Digital Sticky Notes in Flipgrid allow students to jot down key points and notes they want to remember, increasing confidence as they share their ideas” (Flipgrid, 2021).
  • You can allow/disallow students to attach a URL to their video.

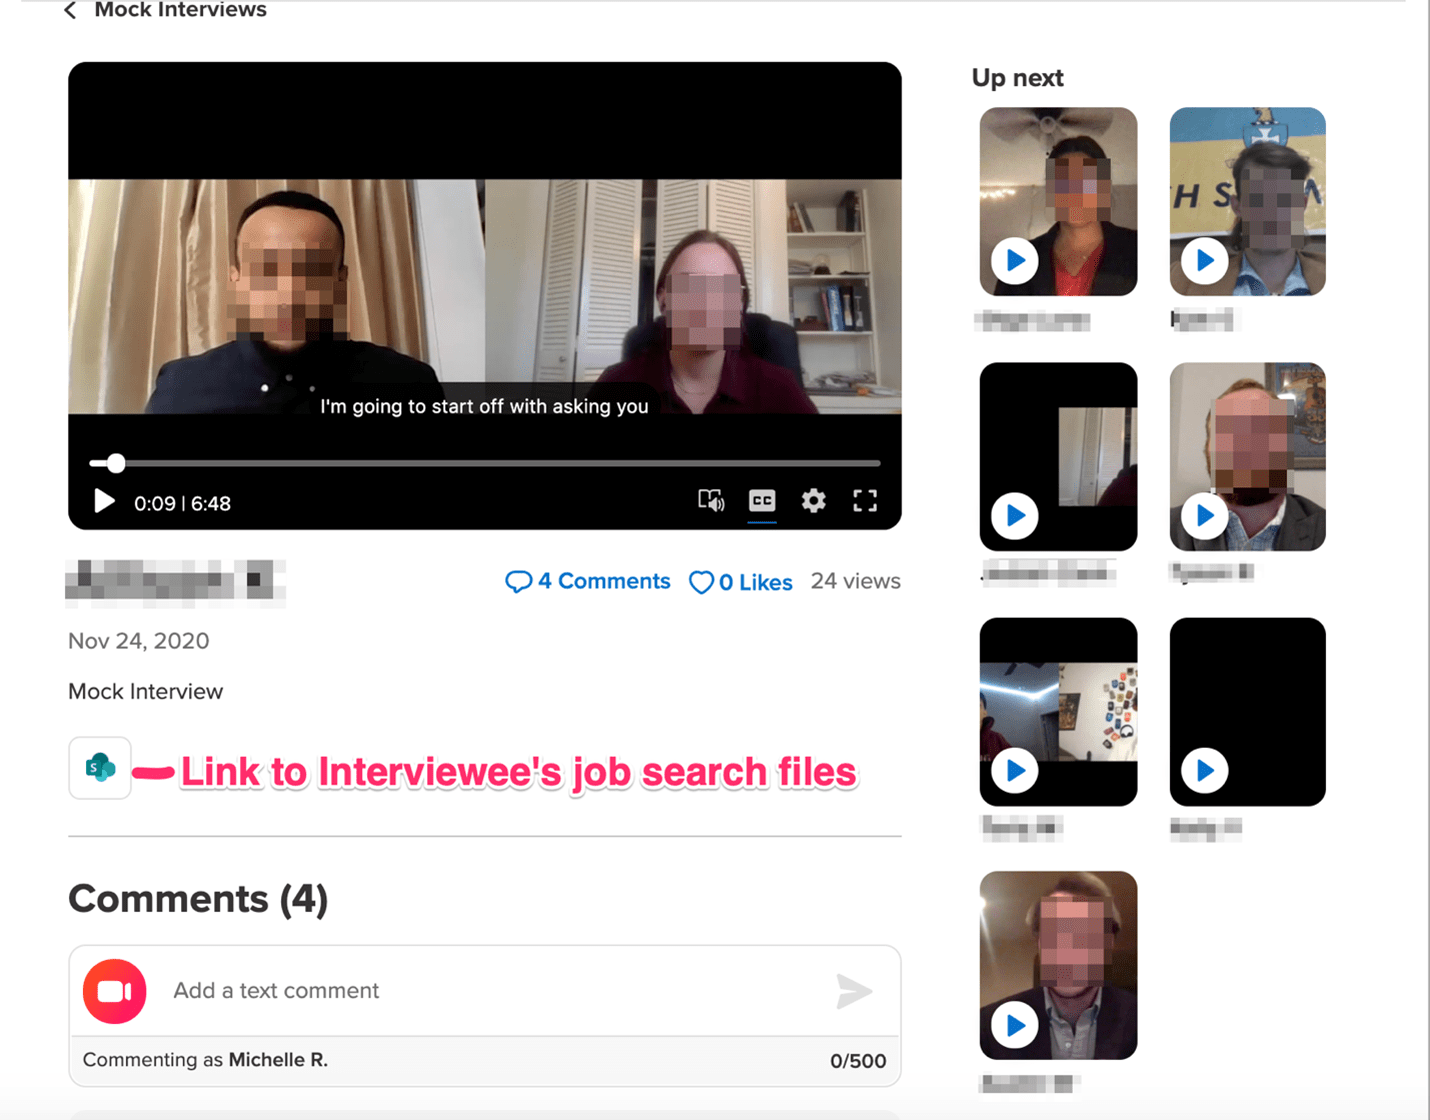
The last bullet is the most needed aspect for this project because it allows students to upload/record their mock interview AND insert a Microsoft 365 OneDrive folder URL, so that their peers and instructor(s) can easily view the associated documents. See the screenshot below.

The stage for the FlipGrid discussion is easy to navigate. Simply scroll down to see any links and video or text comments left under the video. Click “up next” to see the next submission.

Screenshot showing a FlipGrid discussion stage.

Discussion stage example

Below are two documents providing instructions for faculty and students use in FlipGrid:

Flipgrid Instructions for Faculty

Flipgrid Instructions for Students

By combining the FlipGrid and Microsoft Office OneDrive tools, students can present larger projects in which several deliverables are needed, such as a video and either a single document or a folder of documents from OneDrive.

FlipGrid provides an easy to navigate tool for watching peers’ videos and commenting via video or text. Flipgrid is also a great way to simply have discussions about course topics when one might be otherwise tired of text-based discussions. Students and instructors have opportunities to see and hear each other more, which establishes a sense of connection and community in the course.

References

Flipgrid [Computer Software]. (2021). Retrieved from: https://info.flipgrid.com/

Flipgrid. (2021). Camera Shy Tips for Empowering EVERY Individual. Retrieved from: Flipgrid blog

Active Learning in Synchronous Teaching – an IDeaBook blog contribution

A new blog post, Active Learning in Synchronous Teaching has been added to the ODEL IDeaBook.  The post discusses early considerations, management, and usage in Hyflex environments.

https://ideabook.wp.txstate.edu/2021/02/22/active-learning-in-synchronous-teaching/
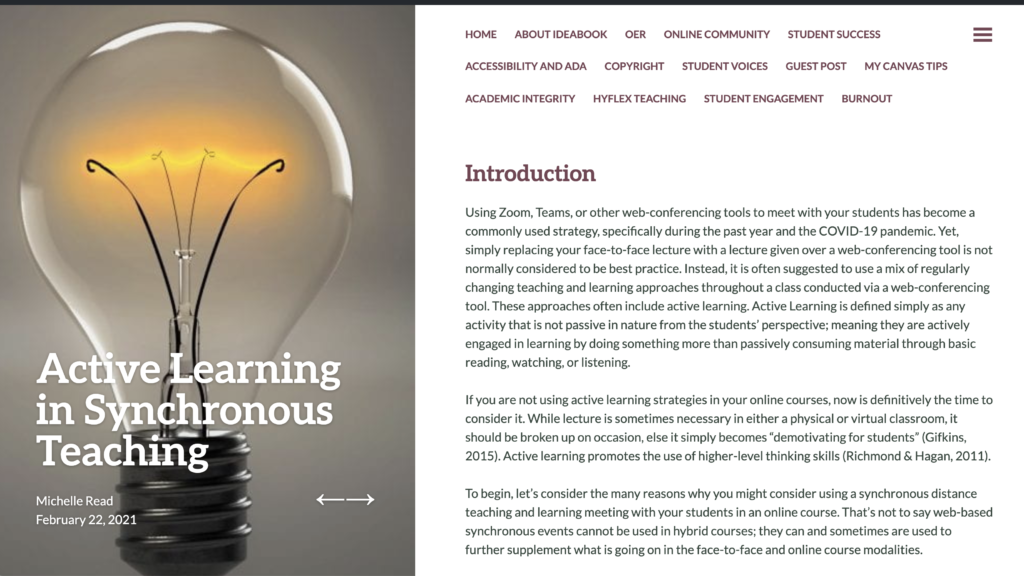
 

Active Learning in Synchronous Teaching post screenshot

Introduction

Using Zoom, Teams, or other web-conferencing tools to meet with your students has become a commonly used strategy, specifically during the past year and the COVID-19 pandemic. Yet, simply replacing your face-to-face lecture with a lecture given over a web-conferencing tool is not normally considered to be best practice. Instead, it is often suggested to use a mix of regularly changing teaching and learning approaches throughout a class conducted via a web-conferencing tool. These approaches often include active learning. Active Learning is defined simply as any activity that is not passive in nature from the students’ perspective; meaning they are actively engaged in learning by doing something more than passively consuming material through basic reading, watching, or listening.

If you are not using active learning strategies in your online courses, now is definitively the time to consider it. While lecture is sometimes necessary in either a physical or virtual classroom, it should be broken up on occasion, else it simply becomes “demotivating for students” (Gifkins, 2015). Active learning promotes the use of higher-level thinking skills (Richmond & Hagan, 2011).

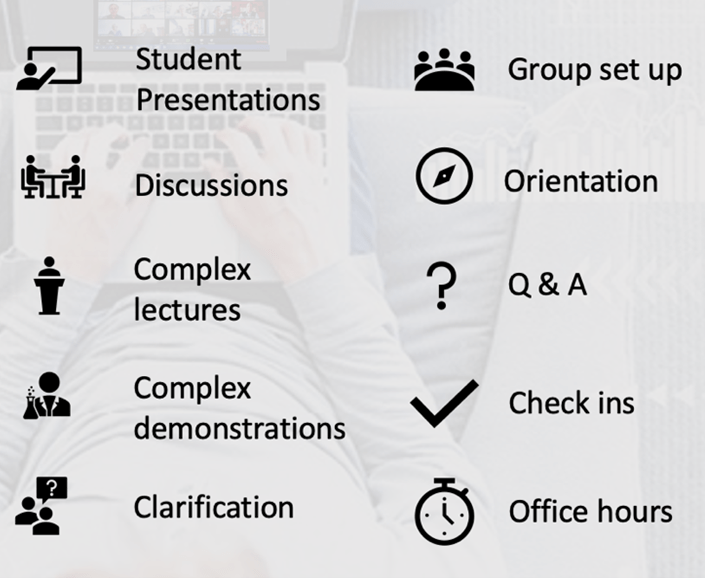
To begin, let’s consider the many reasons why you might consider using a synchronous distance teaching and learning meeting with your students in an online course. That’s not to say web-based synchronous events cannot be used in hybrid courses; they can and sometimes are used to further supplement what is going on in the face-to-face and online course modalities.
""

Important Factors to Consider

Who are your students?

What kinds of technologies do my students likely own and use to access classes?

Who are my shy or reticent students? How am I going to reach them during a synchronous session?

What is the diverse makeup of my class? (age, university classification, majors, personality traits, technology skills, learning styles or preferences, disabilities, those needing challenges, age, other demographics, etc.)

Logistics

Can I make my synchronous classes mandatory?

What time zones are my students located in if they are not physically located in Texas?

Am I going to want, or do I need, students to keep their video feeds on at all times?

What other questions might you ask your students through a survey or questionnaire that might provide you with the information you need to teach them?

Don’t Forget About Inclusion

Issues of diversity and inclusion occur in the classroom, both physical and virtual. Before engaging in active learning strategies, consider the following:

  • Create a safe environment. All students need to feel it is safe to speak and participate in class. Begin by modeling that all comments, questions, etc. are valid and helpful. Model respect, compassion, etc.
  • Specifically talk about diversity and inclusion. Remind students that everyone has a unique voice and perspective to give to learning due to their culture, background, experience, etc.. Consider co-writing with your students an “All-inclusive Visions” for the course.
  • Be sure to include activities that are relevant, not just to the topic, but to the different demographics represented in the class. One of the first things elementary teachers are taught? Use various cultural and ethnic names.
  • Try to keep track of who is participating and who is not? If you really want to make sure you reach out to everyone consider a selection tool/student name randomizer like WheelofNames.com. This tool allows you to add names and select option such as time limits for spins, celebratory sounds (or not), name remover on selection (or not), etc.

Active Learning in Synchronous Class Sessions

The following interactive image describes some common active learning strategies for the physical classroom that can be adapted to the virtual classroom. Click on each checkmark to learn more about the active learning strategy and how it might be adapted for synchronous/online environments.

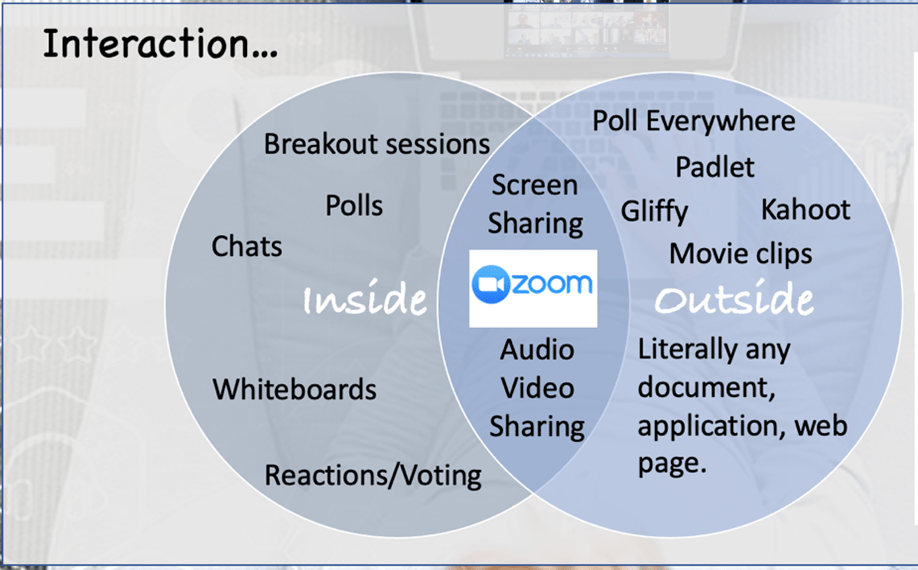
While some lecturing or demonstrating may be needed and may even be the point of your synchronous meeting, keep in mind that it is a good idea to break up the one-to-many conversation flow every 10-15 minutes. You can do this in many ways. The list below refers specifically to Zoom, the primary web-conferencing tool supported by ITAC for the purposes of instructor-led, web-based synchronous sessions:
""

Inside Zoom

Polls – Simple, multiple choice poll that can be created in advance and then launched. Can share results after polling ends.

Break out rooms – You can create multiple breakout rooms in advance or on the fly in Zoom to provide spaces for paired or group discussions. The breakout rooms have the same ability to share screens and whiteboards, etc. as the main room.

Chat – The chat feature allows participants to ask questions of the speaker, who can simply refer to them during or at the end of their presentations. By default, all participants can chat to everyone or privately to others; although, private conversations can be turned off.

Whiteboard – The whole class or groups (within breakout rooms) can brainstorm together on a whiteboard shared by the instructor or student leader. These whiteboards can be saved to the computer. Alternatively, you can simply take a screenshot of the board.

Reactions/voting – This simple feature, located along the bottom toolbar in Zoom, allows participants to clap, like, heart, laugh, wow, or celebrate randomly to what the participants are seeing/hearing or in response to a question posed to them.

Outside Zoom via Share Screen (with or without computer audio)

Annotating – When you share a screen, you can also turn on everyone’s annotation tools. This is great for examining an artifact together. When you are done with that screen, you can simply save the results as a png or pdf, or quickly take a screenshot. Be sure to clear the annotations before beginning on a new screen.

Poll Everywhere —  a more robust polling system which provides codes for texting and live updates seen to all via your shared screen.

Video clip – Any video clip including YouTube, TedTalk, etc. Be sure to share your computer sound when sharing your screen. BTW, you can still mute your internal mic while the video (and its sound through the computer is being shared); meaning, if you talk during the video, your students won’t hear you if you have muted yourself, but they can still hear the video audio.

Kahoot – An online quizzing/gaming tool.

Gliffy – An online collaborative diagram and chart maker tool. You could share this and have students verbally give you things to add or you can give students the document url and ask everyone to add themselves. All updates can be seen via your shared screen.

Texas State Office 365 Collaborative docs – Any openly shared, editable document. You could share this and have students verbally give you things to add or you can give students the document url and ask everyone to add themselves. All updates can be seen via your shared screen.

Padlet – a brainstorming app. Students will need the link to access via their own browser in order to contribute, but all updates can be seen via your shared screen too. Padlet provides several board templates, including a simple wall, canvas, shelf, stream, timeline, backchannel, map, and grid.

This list just mentions a few. Literally anything you can load onto your computer can be shared with your audience via the web-conferencing tool. When you want them to interact with the material too, simply give them the link to what is displayed through the chat function. This would be important for collaboratively working on a document, presentation, etc. In breakout rooms, all students can go to the same link in their browser to collaborate, or a scribe can be assigned to share their screen and add thoughts provided by their teammates.

Making Active Learning Work in a HyFlex Course

You may be asking yourself how this might work in a HyFlex classroom where some of the students are in a physical classroom and others are attending class virtually. If you allow students in your physical classroom to also connect to the virtual classroom (be sure to have them bring headphones and laptops or mobile devices), then you can utilize break-out rooms the exact same way you would in a completely online/synchronous class session. Or you can allow them to meet in their own Zoom rooms. For many types of active learning such as group discussions, group work in an Office 365 document, brainstorming in Padlet, etc., having everyone on laptops, or at least tablets, is the best option. You may need to designate group leaders to share documents themselves, or simply email any documents needed for the activity to everyone in the class before class begins.

Conclusion

Opportunities for active learning in physical and virtual classrooms is important. Having students learn through a variety of methods including listening to lectures, watching videos, playing games, discussion with peers, brainstorming and creating with peers, etc. is the strongest way to help all students learn regardless of their preferred learning style or preference. It is often fun also, for both students and their instructors.

References

Gifkins, 2015. What Is ‘Active Learning’ and Why Is It Important?. E-International Relations. Retrieved 2/1/21 from: https://www.e-ir.info/2015/10/08/what-is-active-learning-and-why-is-it-important/

Richmond, A. & Hagan, L.K. (2011). Promoting Higher Level Thinking in Psychology: Is Active Learning the Answer? Teaching of Psychology (38)2; 102-105. Retrieved 2/1/21 from: https://www.researchgate.net/publication/273587712_Promoting_Higher_Level_Thinking_in_Psychology_Is_Active_Learning_the_Answer

New publication!

Dr. Elmar Bergeler (a physics instructor at Texas State University) and I have written a paper accepted into the Journal of Science Education and Technology. We originally began working together to create an online version of his face-to-face with high parity in mind. When he then was to teach a section of each, we found a perfect opportunity to truly compare online to face-to-face instruction.


Comparing Learning Outcomes and Satisfaction of an Online Algebra-Based Physics Course with a Face-to-Face Course

https://link.springer.com/article/10.1007/s10956-020-09878-w

UDOIT – Ensuring Accessibility in Canvas — An ODEL IDeaBook Blog contribution

When Texas State University adopted Canvas, we quickly also adopted a tool for use in Canvas called UDOIT. This is a tool that searches for accessibility issues in the course pages. This blog post explains what UDOIT is, why it is important, and how to use it.

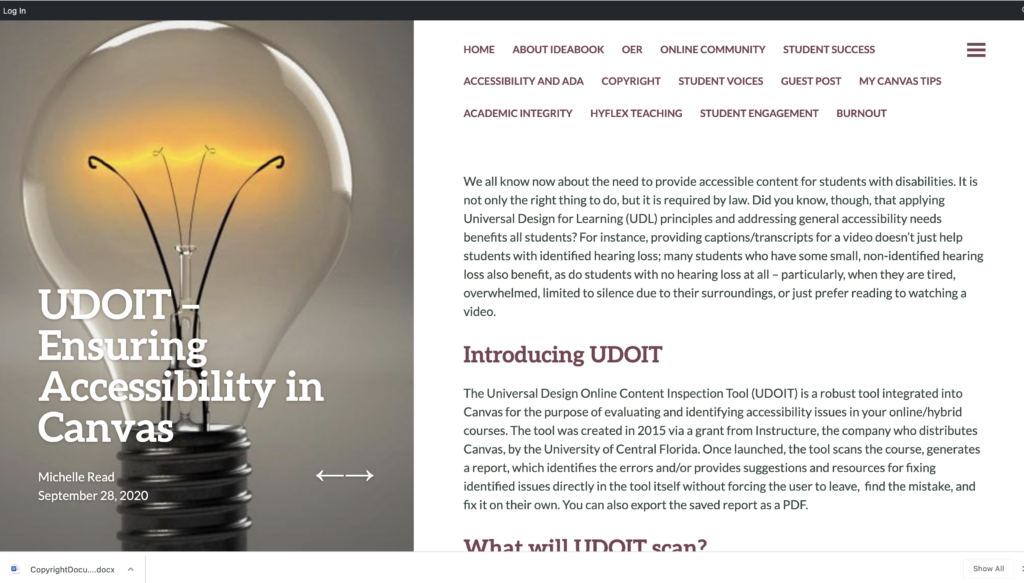
UDOIT – Ensuring Accessibility in Canvas


UDOIT- Ensuring Accessibility for All blog post screenshot

We all know now about the need to provide accessible content for students with disabilities. It is not only the right thing to do, but it is required by law. Did you know, though, that applying Universal Design for Learning (UDL) principles and addressing general accessibility needs benefits all students? For instance, providing captions/transcripts for a video doesn’t just help students with identified hearing loss; many students who have some small, non-identified hearing loss also benefit, as do students with no hearing loss at all – particularly, when they are tired, overwhelmed, limited to silence due to their surroundings, or just prefer reading to watching a video.

Introducing UDOIT

The Universal Design Online Content Inspection Tool (UDOIT) is a robust tool integrated into Canvas for the purpose of evaluating and identifying accessibility issues in your online/hybrid courses. The tool was created in 2015 via a grant from Instructure, the company who distributes Canvas, by the University of Central Florida. Once launched, the tool scans the course, generates a report, which identifies the errors and/or provides suggestions and resources for fixing identified issues directly in the tool itself without forcing the user to leave,  find the mistake, and fix it on their own. You can also export the saved report as a PDF.

What will UDOIT scan?

UDOIT will scan:

  • Announcements
  • Assignments
  • Discussions
  • Files
  • Pages
  • Syllabus
  • Module URLs
  • Unpublished content

What are the Tool’s Limitations?

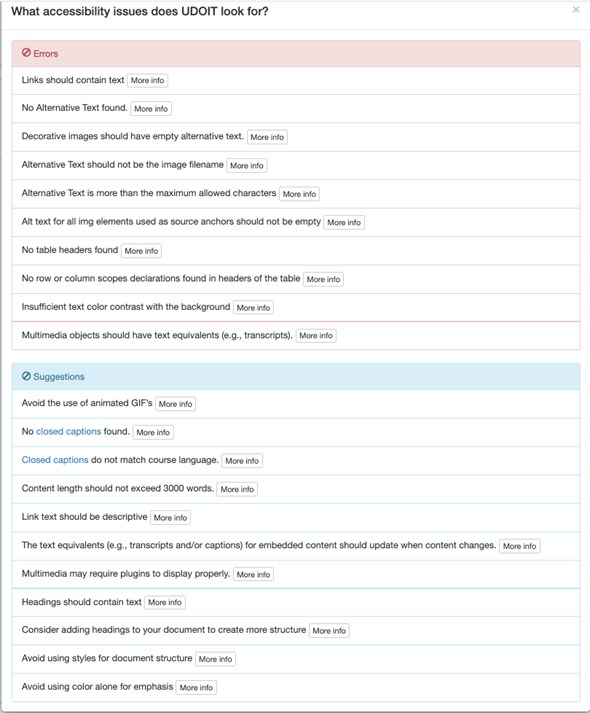
Tool limitations currently include its inability to scan all files, particularly external documents and some audio/video files. Additionally, you must remain on the UDOIT page while the course is being scanned. Finally, the tool is not considered a certification that the course is deemed “accessible”. It simply provides guides. The following screenshot shows exactly what UDOIT is scanning for in the course.  Note the list of suggestions following the list of errors.

List of Errors

List of Errors revealed using UDOIT


More Information

The source code for the tool is licensed under the GPL V3 open source license, meaning it is free to use.

Please use the UDOIT-UserGuide for instructions on how to launch and work with the UDOIT accessibility scanning tool for Canvas LMS.

Please check out our other blog posts on Accessibility to learn about:

  • Making PDFs Work for Everyone (This post focuses on converting and creating PDFs, the reasons for doing so, and how to make sure they are accessible.)
  • Is Your Course Accessible for All? (This link provides information on how to make your Word, PowerPoint, PDFs, etc., accessible and how to check the accessibility of each type along with some basic tips to consider).

To hear more about student concerns related to online/hybrid courses and accessibility, check out:

Conclusion

As a recent email from our provost suggest, the use of captions and transcripts benefit everyone. In keeping with the principles of UDL, making material accessible also benefits everyone. Be proactive! Make accessibility a top priority, one you consider and apply during design and creation.

Resources

Bates, TRJ. (2016). UDOIT Information. Canvas Community. https://community.canvaslms.com/t5/Accessibility/UDOIT-Information/ba-p/242723

DOOIT/ITAC. (n.d.). UDOIT. Texas State University. https://itac.txstate.edu/support/canvas/lti/udoit.html

UCF’s Center for Distributed Learning. (2016). Universal Design Online Content Inspection Tool (UDOIT). University of Central Florida. https://cdl.ucf.edu/teach/accessibility/udoit/

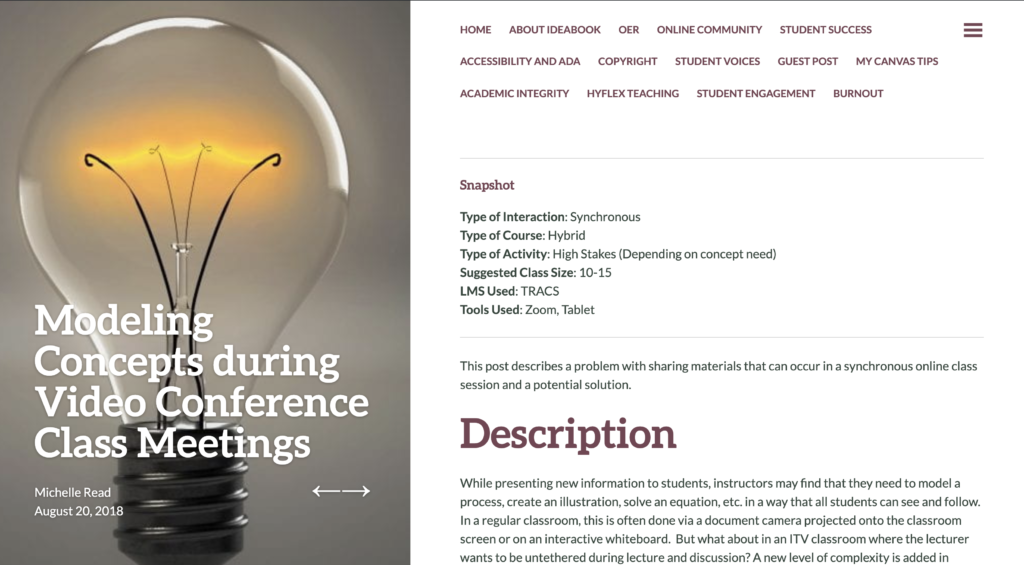
Modeling Concepts during Video Conference Class Meetings – an IDeaBook Blog contribution

This posts piggybacks off the Recording Demonstrations Using Tablets, by explaining how an instructor can use Tablets to demonstrate in live synchronous classes.

Modeling Concepts during Video Conference Class Meetings


Modeling Concepts during Video Conference Class Meetings Screenshot


This post describes a problem with sharing materials that can occur in a synchronous online class session and a potential solution.

Description

While presenting new information to students, instructors may find that they need to model a process, create an illustration, solve an equation, etc. in a way that all students can see and follow. In a regular classroom, this is often done via a document camera projected onto the classroom screen or on an interactive whiteboard.  But what about in an ITV classroom where the lecturer wants to be untethered during lecture and discussion? A new level of complexity is added in sharing the material with students when they are located in multiple places and the instructor doesn’t want to stand behind the podium to lecture.

Process/Tool Implementation

Through the dual use of Zoom (or another web-conferencing solution) and a tablet, such as an iPad or Android device, an instructor can write on a whiteboard app and easily share it from around the room and to many locations in a few easy steps:

  1. Create and share a Zoom room URL.
  2. Download the Zoom app on your tablet.
  3. Connect to the Zoom room on your classroom computer and project your screen.
  4. Begin recording in the Zoom room.
  5. Have remote students (any who are not located in the same physical classroom as the instructor) follow the url to go to the Zoom room.
  6. Open the Zoom app on your tablet and connect to the Zoom room using the same credentials used to logon to the classroom computer.
  7. Click “Share Your Screen” within the Zoom app.
  8. Open your favorite whiteboard app on your tablet and begin writing.

Trim your recording to include only the demonstration and upload it to MediaFlo, so students can be provided a URL to review the demonstration again.

By using Zoom and a tablet, you can connect your tablet to the system in a way that is IT Security approved and allows you to get out from behind the podium. You can share any tablet application in this way. You can also hand the tablet to a student if they are in the same location as you and ask them to demonstrate. Finally, students connecting from various locations can also connect and share via their tablets.